• Skip to primary navigation
  • Skip to main content
  • Skip to primary sidebar
  • Skip to footer
thetickledtastebud.com
  • Recipes
  • About Us
  • Contact Us
    • Privacy Policy
  • Navigation Menu: Social Icons

    • Facebook
    • Instagram
    • Pinterest

Mini Blackberry Cheesecakes (Gluten-Free)

February 18, 2021 by Marcie 1 Comment

71
Shares
Jump to Recipe

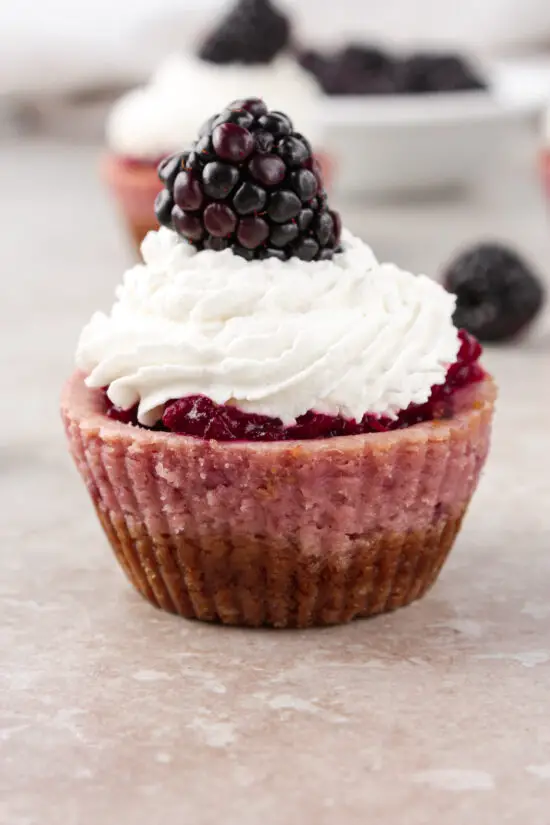
Blackberry takes center stage in these delightful mini desserts. Gluten-Free Mini Blackberry Cheesecakes are the perfect portable sweet treat to take to any party or potluck.
Mini Blackberry Cheesecakes (Gluten-Free)

Cheesecake is one of my favorite desserts. There probably isn’t a cheesecake flavor I don’t like. These Mini Blackberry Cheesecakes will be a hit with your family and friends.

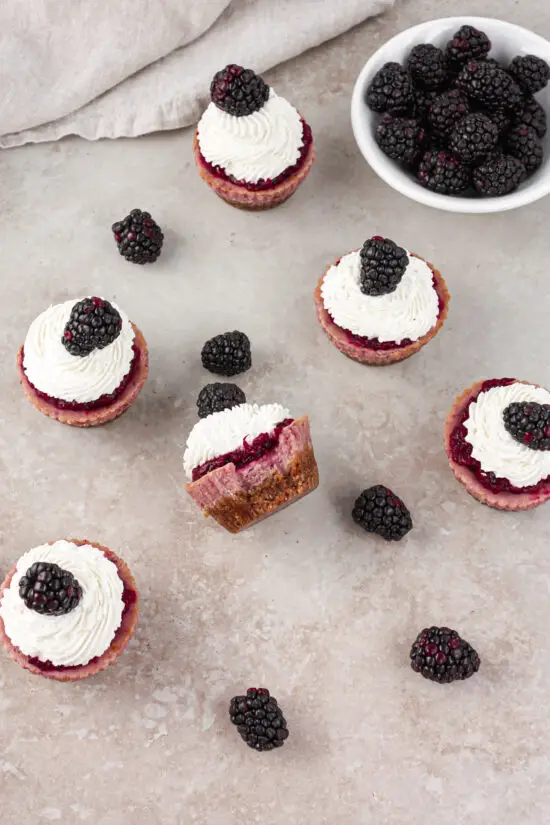
Let’s talk about the layers in these cheesecakes. The bottom layer is a delicious, buttery gluten-free graham cracker crust. The middle layer, is a creamy blackberry cream cheese filling. And the top layer is a luscious homemade blackberry jam.

We like to add whipped cream to our cheesecakes. For best presentation, pipe whipped cream on top of cheesecakes and add a fresh blackberry on top.
Mini Blackberry Cheesecakes (Gluten-Free)

Making Gluten-Free Mini Blackberry Cheesecakes

NOTE: Make sure the dairy products and egg are taken out of fridge and left on counter to come to room temperature before using in recipe. Don’t skip this step!

Gluten-Free Crust

Preheat oven to 325 degrees.

Line cupcake pan with cupcake liners; preferably silicon liners.

In a food processor or high speed blender, blend graham crackers until they become finely ground crumbs, like sand.

Next, combine the graham cracker crumbs , melted butter, and sugar together in a bowl.

Once combined, scoop about a heaping tbsp. worth of crumb mixture into each cupcake liner and press it down firmly with back of spoon or small shot glass. Set pan aside.

NOTE: It’s real difficult to find gluten-free graham crackers in stores so I used Pamela’s Gluten-Free Graham Crackers that I bought through Amazon.

Cream Cheese Filling

Using a hand mixer or stand mixer, beat cream cheese on high for about one minute so it’s creamy.

Add in the granulated sugar and continue to beat on medium/high speed until just combined.

Next, add in the vanilla extract, sour cream, egg, and seedless blackberry fruit spread and blend until mixture is well combined.

Once combined, scoop cheesecake batter evenly on top of each crust in your cupcake liners.

Bake cheesecakes for about 20-25 minutes. Ours baked for about 22 minutes. The cheesecakes will still have a little jiggle in the middle, that’s ok.

Once done, turn off the oven and crack open oven door so the cheesecakes will “cool down” just a bit. About 10 minutes.

Take cheesecakes out of oven and let cool down on cooling rack for about 30 minutes before putting in the fridge to chill.

Chill them for at least 6 hours or overnight.

Blackberry Jam

In a medium saucepan on low/medium heat, add frozen blackberries, sugar, lemon zest, lemon juice, and corn starch.

Continuously mash blackberries until mixture starts to thicken and resembles the consistency of jam. It should be able to coat the back of a spoon when dipped in.

After the cheesecakes have cooled in the fridge, top them with two teaspoons of the blackberry jam.

Optional pipe on or dollop homemade or store bought whipped cream and add fresh blackberries on top.

Makes 12 mini cheesecakes. Enjoy!

Marcie

Mini Blackberry Cheesecakes (Gluten-Free)

5 from 1 vote
Blackberry takes center stage in these delightful mini desserts. Gluten-Free Mini Blackberry Cheesecakes are the perfect portable sweet treat to take to any party or potluck.
Print Recipe Pin Recipe
Prep Time 22 minutes mins
Cook Time 20 minutes mins
Chilling Time 6 hours hrs
Servings: 12 people
Course: Dessert
Cuisine: American
Calories: 334
Ingredients Equipment Method Nutrition Notes

Ingredients
  

Graham Cracker Crust:
  • 1 1/3 cups gluten-free graham cracker crumbs, finely ground
  • 5 tbsp. butter, melted
  • 2 tbsp. granulated sugar
Cream Cheese Filling:
  • 8 oz. cream cheese, softened
  • 1/2 cup granulated sugar
  • 1 tsp. vanilla extract
  • 1/4 cup seedless blackberry fruit spread or jam
  • 1/4 cup sour cream
  • 1 egg, room temperature
Blackberry Jam:
  • 10 oz. bag frozen blackberries
  • 5 tbsp. granulated sugar
  • 1 tsp. lemon juice
  • zest from one lemon
  • 2 tbsp. corn starch

Equipment

  • Cupcake pan
  • Silicon cupcake liners

Method
 

Gluten-Free Crust
  1. Preheat oven to 325 degrees.
  2. Line cupcake pan with cupcake liners; preferably silicon liners.
  3. In a food processor or high speed blender, blend graham crackers until they become finely ground crumbs, like sand.
  4. Next, combine the graham cracker crumbs , melted butter, and sugar together in a bowl.
  5. NOTE: It's real difficult to find gluten-free graham crackers in stores so I used Pamela's Gluten-Free Graham Crackers that I bought through Amazon.
Cream Cheese Filling
  1. Using a hand mixer or stand mixer, beat cream cheese on high for about one minute so it's creamy.
  2. Add in the granulated sugar and continue to beat on medium/high speed until just combined.
  3. Next, add in the vanilla extract, sour cream, egg, and seedless blackberry fruit spread and blend until mixture is well combined.
  4. Once combined, scoop cheesecake batter evenly on top of each crust in your cupcake liners.
  5. Bake cheesecakes for about 20-25 minutes. Ours baked for about 22 minutes. The cheesecakes will still have a little jiggle in the middle, that's ok.
  6. Once done, turn off the oven and crack open oven door so the cheesecakes will "cool down" just a bit. About 10 minutes.
  7. Take cheesecakes out of oven and let cool down on cooling rack for about 30 minutes before putting in the fridge to chill.
  8. Chill them for at least 6 hours or overnight.
Blackberry Jam
  1. In a medium saucepan on low/medium heat, add frozen blackberries, sugar, lemon zest, lemon juice, and corn starch.
  2. Continuously mash blackberries until mixture starts to thicken and resembles the consistency of jam. It should be able to coat the back of a spoon when dipped in.
  3. After the cheesecakes have cooled in the fridge, top them with two teaspoons of the blackberry jam.
  4. Top with homemade or store bought whipped cream and add fresh blackberries on top.
  5. Makes 12 mini cheesecakes. Enjoy!

Nutrition

Calories: 334kcalCarbohydrates: 47gProtein: 3gFat: 15gSaturated Fat: 8gPolyunsaturated Fat: 0.5gMonounsaturated Fat: 2gTrans Fat: 0.2gCholesterol: 55mgSodium: 205mgPotassium: 104mgFiber: 2gSugar: 29gVitamin A: 358IUVitamin C: 6mgCalcium: 59mgIron: 1mg

Notes

NOTE: Make sure the dairy products and egg are taken out of fridge and left on counter to come to room temperature before using in recipe. Don’t skip this step!


Tried this recipe?

Let us know how it was!

For another delicious cheesecake recipe, check out our Pumpkin Cheesecake (Gluten-Free).

Click here to see all of our other desserts.

If you’re on Pinterest, please follow us! And also make sure to pin this picture below to your Pinterest boards.

You can also find us over on Facebook and Instagram. In fact, if you make any of our recipes, please tag us on Instagram at @thetickledtastebud so we can see your pics!

Happy Eating!
Mini Blackberry Cheesecakes (Gluten-Free)

Copyright © The Tickled Tastebud. All content and images are copyright protected. Do not use any images without prior permission. If you want to republish this recipe, make sure to re-write the recipe in your own words and only list ingredients making sure to like back to this post for the original recipe and directions.

Filed Under: Cakes & Cupcakes, Desserts, Gluten-Free

Previous Post: « Gluten-Free Funfetti Cake
Next Post: Gluten-Free S’mores Cookie Bars »

Reader Interactions

Comments

  1. Karel Coleman

    November 8, 2025 at 8:53 am

    Your comment is awaiting moderation.

    Hello!
    thetickledtastebud.com, Thanks for keeping a thoughtful corner of the internet alive.

    I recently published my ebooks and training videos on
    https://www.hotelreceptionisttraining.com/

    They feel like a rare find for anyone interested in hospitality management and tourism. These ebooks and videos have already been welcomed and found very useful by students in Russia, the USA, France, the UK, Australia, Spain, and Vietnam—helping learners and professionals strengthen their real hotel reception skills. I believe visitors and readers here might also find them practical and inspiring.
    Unlike many resources that stay only on theory, this ebook and training video set is closely connected to today’s hotel business. It comes with full step-by-step training videos that guide learners through real front desk guest service situations—showing exactly how to welcome, assist, and serve hotel guests in a professional way. That’s what makes these materials special: they combine academic knowledge with real practice.

    With respect to the owners of thetickledtastebud.com who keep this platform alive, I kindly ask to share this small contribution. For readers and visitors, these skills and interview tips can truly help anyone interested in becoming a hotel receptionist prepare with confidence and secure a good job at hotels and resorts worldwide. If found suitable, I’d be grateful for it to remain here so it can reach those who need it.

    Why These Ebooks and Training Videos Are Special
    They uniquely combine academic pathways such as a bachelor’s degree in hospitality management or a advanced hotel management course with very practical guidance on the hotel front desk job duties. They also cover the hotel front desk job description, and detailed hotel front desk tasks.

    The materials go further by explaining the reservation systems in hotels, hotel check-in, check-out flow, guest service handling, and practical guest service recovery—covering nearly every situation that arises in the daily business of a front office operation.

    Beyond theory, my ebooks and training videos connect the academic side of hospitality management studies with the real-life practice of hotel front desk duties.

    – For students and readers: they bridge classroom study with career preparation, showing how hotel and management course theory link directly to front desk skills.
    – For professionals and community visitors: they support career growth through interview tips for receptionist, with step-by-step questions to ask a receptionist in an interview. There’s also guidance on writing a strong receptionist job description for resume.

    As someone who has taught hotel and management courses for nearly 30 years, I rarely see materials that balance the academic foundation with the day-to-day hotel front desk job requirements so effectively. This training not only teaches but also simulates real hotel reception challenges—making it as close to on-the-job learning as possible, while still providing structured guidance.

    I hope the owners of thetickledtastebud.com, and the readers/visitors of thetickledtastebud.com, will support my ebooks and training videos so more people can access the information and gain the essential skills needed to become a professional hotel receptionist in any hotel or resort worldwide.

    Appreciate you and your community.

    Reply
  2. Lori

    March 9, 2021 at 5:28 pm

    5 stars
    Thanks for the recipe, these were so good!

    Reply

Leave a Reply Cancel reply

Your email address will not be published. Required fields are marked *

Recipe Rating


Primary Sidebar

Recipe Newsletter

Sign up with your email address to receive news and updates.

Thank you for subscribing!

About Us

Hey foodies, it’s Marcie and Kevin. Food has the ability to bring people together and evoke feelings of happiness. Let us help you make something great in the kitchen.

Love to hear from you,

Categories

Follow Us

  • Facebook
  • Instagram
  • Pinterest

Recent Posts

  • The Best Glazed Lemon Blueberry Scones Recipe
  • Easy Chili Cheese Dip – The Ultimate Party Appetizer

Search

Footer

recipes

  • Recipes
  • About Us
  • Contact Us
    • Privacy Policy

Copyright © 2025 thetickledtastebud.com on the Foodie Pro Theme