Everyday can be a celebration when you eat this totally awesome Gluten-Free Funfetti Cake!
This is my birthday month (February) and I wanted to treat myself. I really wanted to try my hand at a three layer stacked cake. What better way to practice then by making my own birthday cake?

It’s hard to find gluten-free cakes and not all bakeries offer them. This is the reason why I made my own. I eat gluten-free and I didn’t want to miss out on a birthday cake this year.
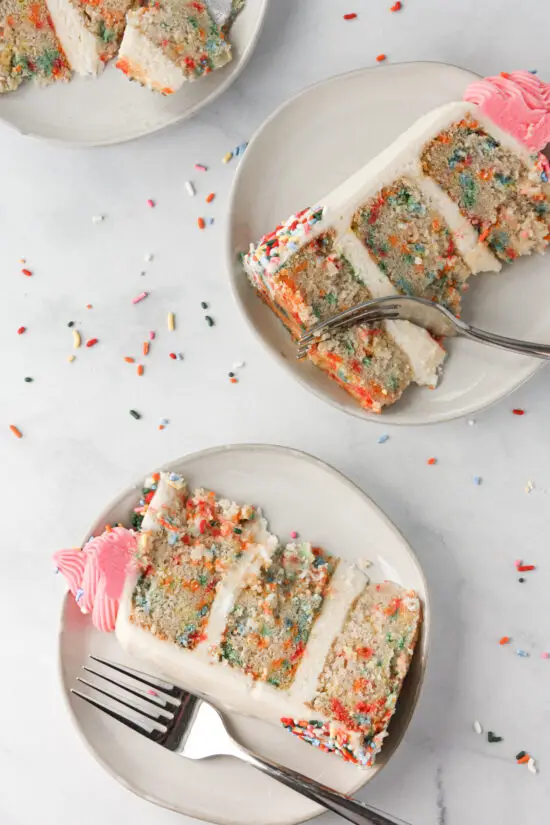
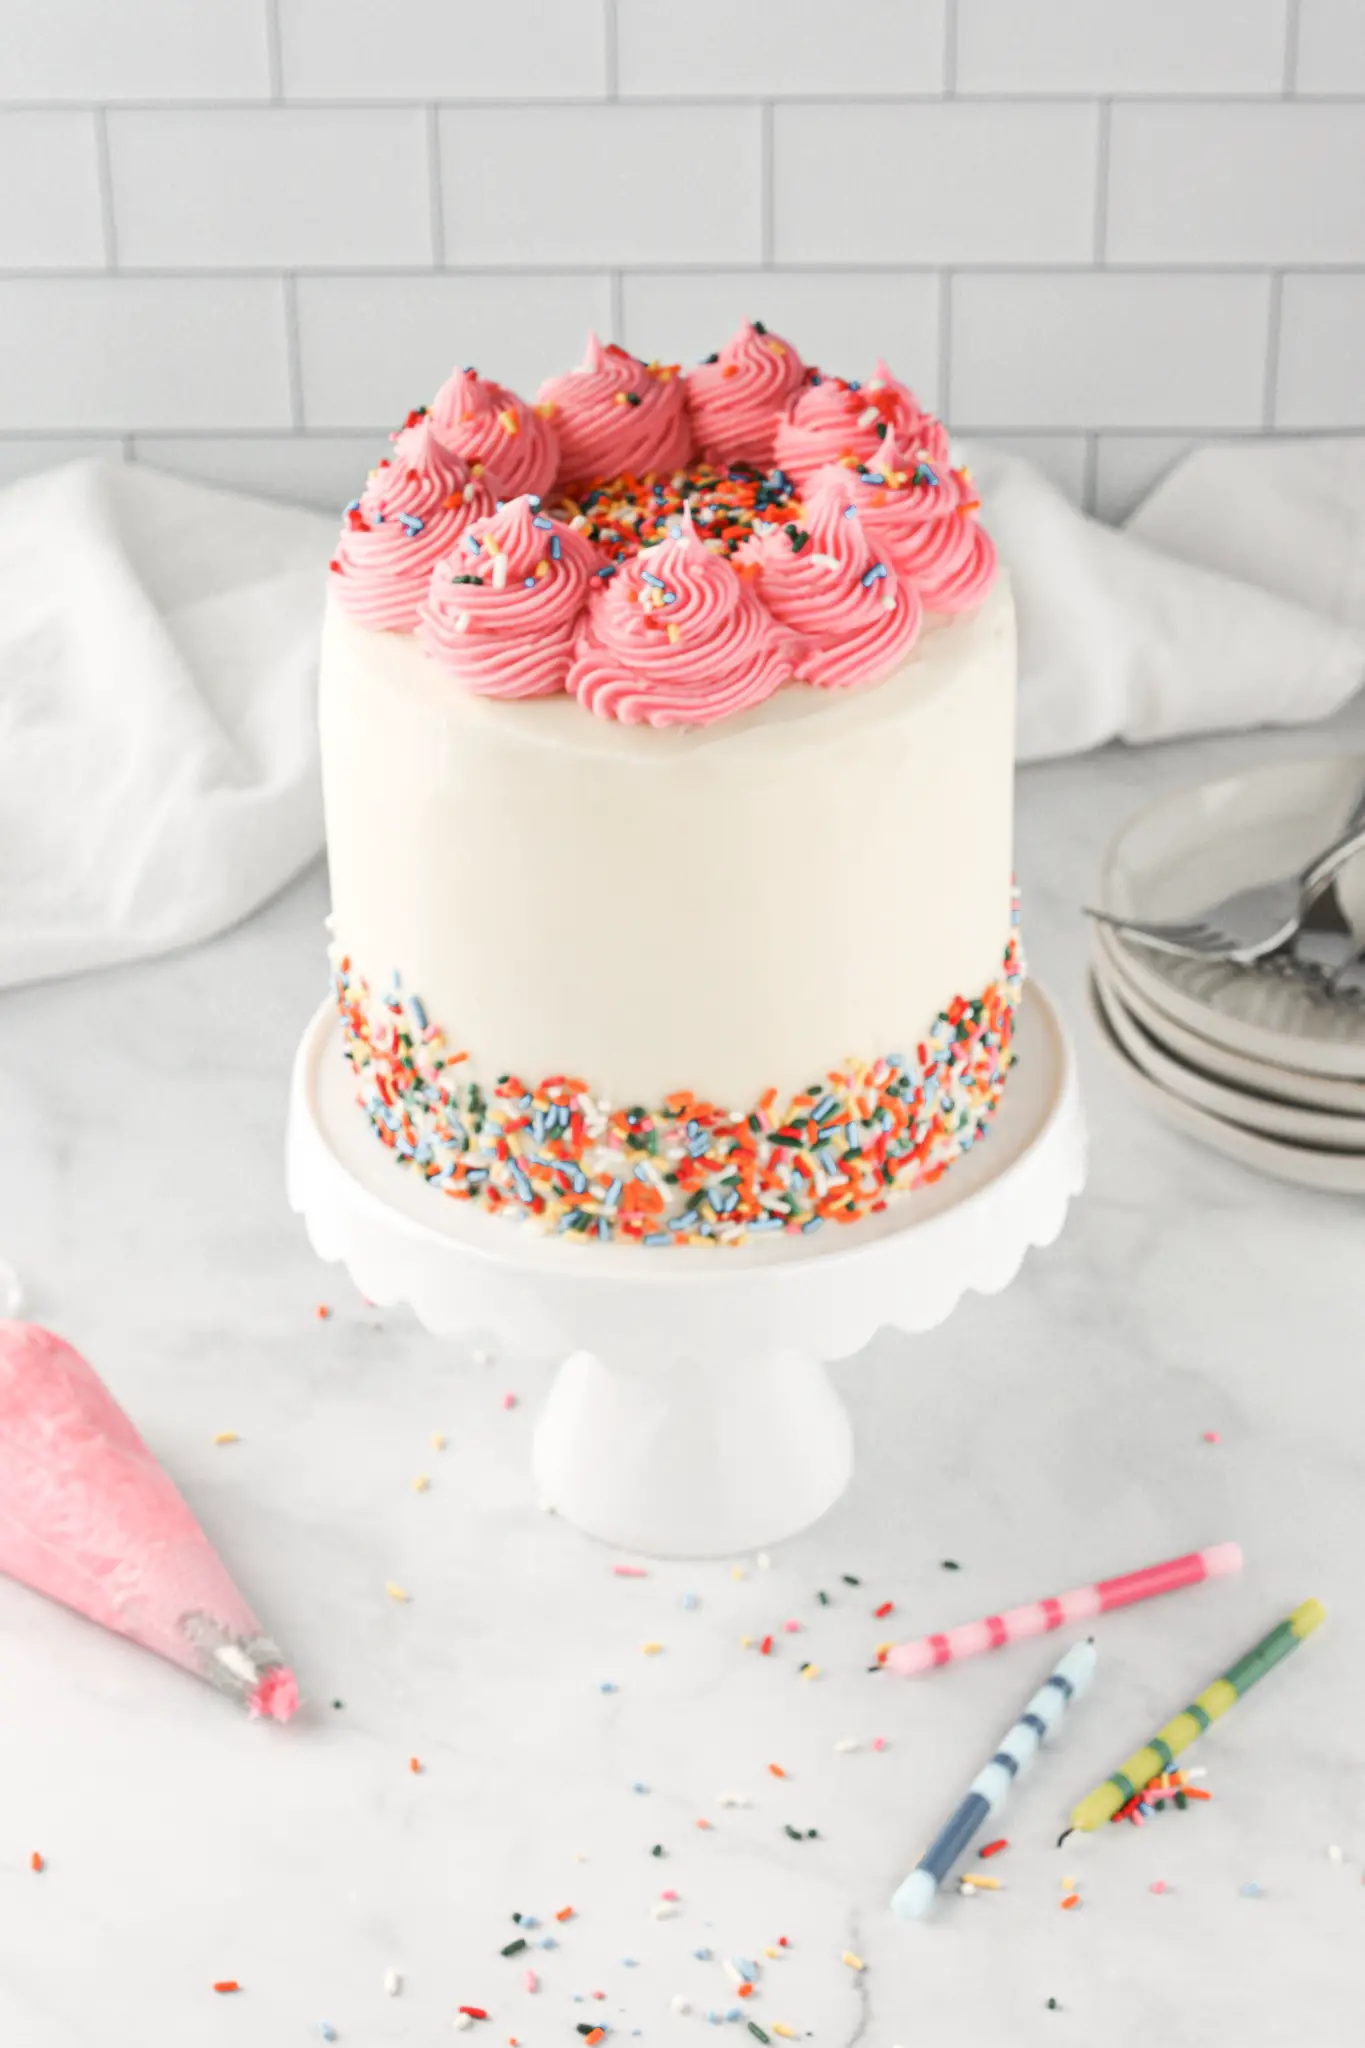
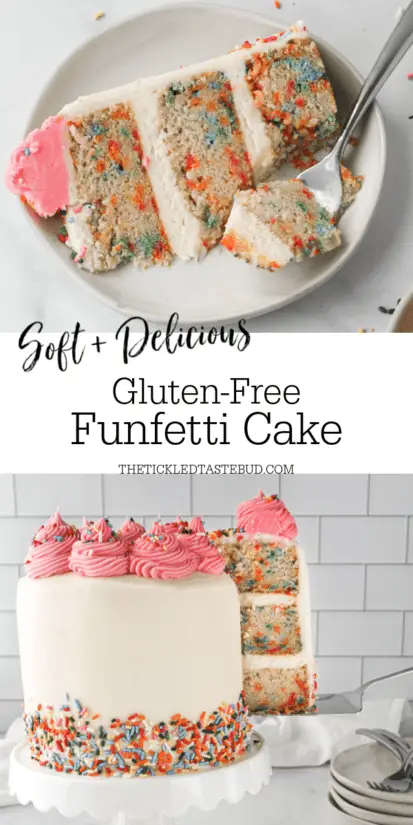
This Gluten-Free Funfetti Cake is made entirely from scratch. The cake is a tender and soft white cake filled with colorful sprinkles.
I made a delicious buttercream frosting to fill in between the cake layers and completely cover the cake.
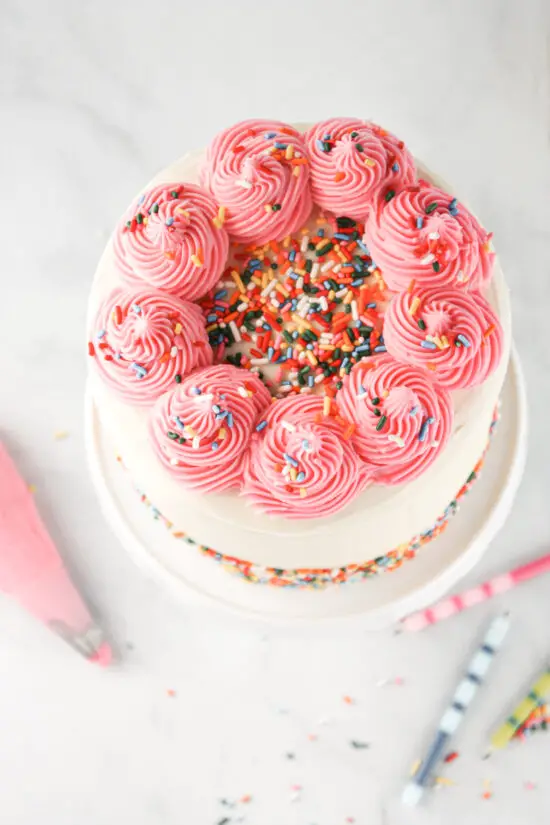
As you can see by the pictures, I piped on pink buttercream swirls on the top of the cake; feel free to leave them white or tint any color you’d like.
This cake, of course, is great for birthdays or any fun celebration you have in mind. In fact, use different colored sprinkles and frosting to match any holiday or special occasion.
Make Sure to Use Room Temp. Ingredients
When making the cake and frosting, it’s essential that you take out the dairy products and eggs at least one hour before using them.
Room temperature ingredients blend together more efficiently and ensure for a more fluffier and lighter cake. So don’t skip this step!
For other yummy cake recipes you may like, check out our Refreshing Lemonade Cake and Gluten-Free Double Chocolate Bundt Cake. You can’t go wrong with either.
Gluten-Free Funfetti Cake
Ingredients
Equipment
Method
- Prepare each 6" cake pan by thoroughly coating with cooking spray. Then, line each bottom of pan with parchment paper and then give a quick spray over paper.
- Preheat oven to 350 degrees F.
- Start by creaming softened butter and sugar together with a hand mixer on medium/high speed. Blend until light and fluffy.
- Next, add in vanilla extract and egg whites. Blend well between each egg added.
- In another bowl, whisk dry ingredients together (flour, baking soda, baking powder, and salt).
- To the bowl with wet ingredients, alternate adding in dry ingredients and buttermilk. Blend on high speed until everything is completely combined.
- Stir in sprinkles by hand.
- Pour batter evenly between three 6" round cake pans.
- Bake for about 30-35 minutes or until toothpick inserted in middle of cake comes out clean.
- Allow cakes to cool on cooling rack for about 20 minutes before trying to remove from pans.
- Remove parchment paper from bottom of cakes. Allow cakes to cool completely before attempting to frost.
- In a large bowl, cream together softened butter and cream cheese on medium/high speed until mixture is creamy and fluffy.
- Add in the vanilla extract and heavy whipping cream and continue to beat.
- Add the powdered sugar in slowly so it doesn't kick up in your face. I find that adding in 1/2 cup at a time is best.
- Trim small amount off tops of cakes as needed to make even cake layers.
- Place first cake layer on cake plate and add frosting, spreading it around so it's even.
- Place second cake layer on top. Add more frosting on top and spread evenly around.
- Lastly, add third cake layer on top and add remaining frosting making sure to evenly coat the top and sides of cake.
- Pipe buttercream swirls on top of cake* and add sprinkles to top and sides of cake. *See notes
- Makes about 8 servings depending on thickness of each slice. Enjoy!
Nutrition
Notes
Tried this recipe?
Let us know how it was!We hope you enjoy this fun and delicious funfetti cake recipe. If you make it, please let us know down in the comments how you liked it.
We’d appreciate it if you gave this recipe a star rating, too!

Attached is a link to Amazon if you need 6″ round cake pans
If you are looking for a cute Small Cake Stand, I found this particular one at Target.
If you’re on Pinterest, please follow us! And also make sure to pin this picture below to your Pinterest boards.
You can also find us over on Facebook and Instagram. In fact, if you make any of our recipes, please tag us on Instagram at @thetickledtastebud so we can see your pics!
Happy Eating!
Copyright © The Tickled Tastebud. All content and images are copyright protected. Do not use any images without prior permission. If you want to republish this recipe, make sure to re-write the recipe in your own words and only list ingredients making sure to like back to this post for the original recipe and directions.
Marcie
Hello Ashely,
Sorry for the late response. You can very much make the buttercream frosting without the cream cheese. I just like to add the cream cheese to balance out the sweetness of the buttercream frosting. I hope you get around to making this recipe, or if you have already please let us know how it turned out for you! Take Care
Ashley
Hello!
Would this cake taste good with a buttercream that does not use cream cheese? Or does that balance out the buttermilk?
Thank you!
Mark
Thanks for your blog, nice to read. Do not stop.
Marcie
Hello Nicole,
I would say that if you make this cake in advance, no more than 2-3 days for the freshest taste and texture. It won’t go bad, by any means, I’m just thinking more for taste and such. Hope this helps 😀👍🏼
Marcie
Nicole
Hello!!! If I make this a head of time, how long is it good for in the fridge? Thank you!!!!!
Karen Stockton
This cake recipe is amazing! I bake all of the time and I absolutely love this cake. I used Cup4cup flour and it came out perfectly. It rises well and has the right consistency for cake batter. Thanks for the great recipe!
Marcie
Hello Maria,
Yes, you can freeze the individual cake layers and freeze them until next week. Just wrap each cooled cake layer in plastic wrap and then in foil and freeze them. When you’re ready to decorate, take cake layers out of freezer and take off plastic wrap and foil and allow to come to room temperature before you decorate. Hope this helps and we hope you enjoy this delicious Gluten-Free Funfetti Cake.
Marcie
Maria
How does this cake freeze? Could I make the cake this weekend and dress it next weekend?
Marcie
Hello Catherine
If you’re going to use your 9″ cake pans divide the cake batter between two 9″ cake pans.
thanks,
Kevin
Catherine
Hi there,
One question…
Can I use two 9” cake pans? I really don’t want to buy three 6” pans.
Thanks for your time.